Showing posts with label Kindergarten. Show all posts

Weekly Kid's Co-Op Linky! 4.5.12


Guess what time of the week it is??  Time for the weekly kid's Co-Op  Yeah!!  This week is full of fun Easter activities to do with kids.  Don't forget to link up after you have looked at all of the fabulous posts.  Here are a few of my Favorites from last week. 

http://www.readingconfetti.com/2012/03/colored-ice-cube-sensory-play.html
Now that the weather is starting to get nice out this would be a fun summer sensory activitiy!


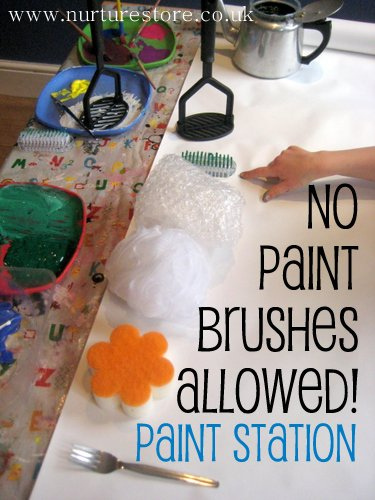
I love using crazy tools for painting!  Here is a fun post about that!


This just incredible!!  We tried a project similar to this last month.  The kids will be fascinated with watching the crystals form and grow.  You can use google translate to read this post. 

I was so excited about this post because my husband already said he wanted to make me a light table this summer so now we know how! 

Here is my post for this week!
Now that you have seen a few of my favs from last week, here is the link up!
Rachel  


Easter Snacks


Easter snacks can be a great way to express creativity and now with all of the fabulous ideas swirling around on pinterest I am never going to run out of creativity!  I used to be the mom that made the crazy homemade chocolate sculptures and 4 tier cakes ect.  Don’t get me wrong, I still love a great cake making session but I have come to the reality that I am a super busy working mom and shortcuts are necessary!  The first snack I am going to talk about is one that is super easy and I literally came up with it on the fly!  Hmm seems like a theme lately.  I used pre-packaged rice crispy treats, licorice, m&m’s, marshmallows and peeps. 


First you flatten and mould the rice crispy treat into a basket.  The more you mould the treat it takes on the consistency of clay.  The next step is to peel a piece of licorice off and press it into the rice crispy basket to make a handle.  Step three is to add m&m’s and marshmallows.  Finally, add the peeps and eat it! 

Our next snack was one I found on my Pinterest Spring Board from http://www.armelleblog.com/2012/04/diy-easter-carrot-snacks.html You just need cone shaped bags, green construction paper, tape and goldfish or organic bunny crackers.  Fill the bags with the crackers.  Twist and tape the top to a point.  Finally, you tape on the green stems.  Easy Peasy Lemon Squeezy!  


Our last snack was the bird nest treats. 

Bird's Nest Treats
12 oz. package chow mein noodles
12 oz. package butterscotch morsels

6oz. White Chocolate Morsels
robin egg whoppers

Bird peeps  

Pour the butterscotch and white Chocolate morsels in a microwave-safe bowl and place them in the microwave. Heat for 30 seconds then remove to stir. Return to the microwave and heat again for 30 seconds. Stir until melted. Add in the chow mein noodles and mix till combined. I let all of the kids have a turn stirring.  You can add a little bit of butter or peanut butter to prevent it from solidifying so quickly.  Place three egg-shaped candies in the center of each nest and the birds on top. 


Let me know if you made any of these snacks and how they turned out! 

RAchel

Fun and Easy Easter Crafts


Easter totally snuck up on me this year!  It was a blessing and a curse.  Normally I would be planning and prepping for weeks but since Spring break was last week I forced myself not to work!  If I would have prepped and planned as usual I would have done the usual crafts.  This year I just wanted to be creative and I tried to think of crafts that the kids would really enjoy doing! 
These are blow paint eggs; all you need is construction paper, paint, droppers or spoons and straws. 
First, you put three or four different colored paints into different containers.  I found these cute egg shaped ones at Ross and we also use them for works.  Use a dropper or spoon in each container.  Instruct the kids to put dabs of paint all over the egg.  When they are finished dabbing the egg they can blow with the straw all over the egg.  The paint will make small bursts of color and the kids love it!  Super easy, frugal and fun! 

We made bunny milk jug Baskets last year.  The key to making these was prep work!  I made sure I had them cut out and the felt ears hot glued on ahead of time.  The kids just put glue and cotton balls on the plastic part.  To prep the bunnies you just cut off the spout and cut out ears on the front.  Leave the handle on the back. 


Today I was in a collage mood, we made two of them.  The first collage was a cross collage.  I ordered the world paper pack from Discount School Supply.  The kids just tore pieces of the paper and tissue paper to make a collage.
 

The second collage we made today was a sticky collage.  I first saw this idea on Teach Preschool and then I saw it on no time for flash cards.  We put contact paper on the table with the sticky side up.  The kids used confetti, shredded paper, paper shapes, feathers and glitter to stick on the table.  They LOVED this activity and made a HUGE mess!!  The messier the more fun right?!  After they were done we folded the paper in half and cut out an oval shape to make an egg.  Super fun, zero prep work and displays great in the window!! 

Next I will post our Easter work trays and activities. 
Rachel

Montessori Monday Lovin Language!


Lovin Language!  What is the best method to teach reading, phonics or whole language?  This is a century old question and I will tell you what method Montessori teaches and why.  Let me first start off by saying that as much as I love Montessori math I LOVE the Montessori method of language instruction even more!  This method of teaching language is so complete and thorough that it not only teaches a child how to read but in the process they will become fluent readers and writers. 


Where do I begin?
Similar to Montessori math, language also starts out very hands on.  Children will learn to build letters and manipulate sounds to spell before they will actually write.  In doing so the child has a complete understanding of the letter and how it is used in the context of words instead of trying to memorize what a foreign symbol is. 


You start out by introducing sandpaper letters.
Sandpaper letters give children a tactile hands on experience with learning letters and sounds.  Here is a great post on living montessori now about sandpaper letters.

After you introduce sandpaper letters and sounds you can add activities to reinforce letter recognition such as sand writing, letter building, play dough, Melissa and doug puzzles, wikki sticks ect.


A sandpaper extension would be beginning sound objects.  Use small, interesting objects in conjunction with the sandpaper letters and place them in baskets for sound sets 1, 2 , 3, 4 and 5.  Everyone has a slightly different method of introducing letter sounds.  This is the method I use. 
sound set one:  m, a, t, s, p
sound set two:  b, c, r, f, e
sound set three:  h, i, d, g, n
sound set four:  j, o, k, l, u, w
sound set five:  x, v, z ,q, y 
As soon as they finish sound set one they can build, spell and read mat, pat, sat, tap, Sam, Pam, map, at and am. 

Also practice blending letters together by saying mmm-aaaa-t say it slow then tell them to say it fast, what does that spell?  Mat!
At this stage play games, games and more games!
Games are a "sneaky" way to reinforce learning without them knowing it.  A few games I like to play are: bingo, I spy, letter hunt and I have who has. 

What happens after they know the sounds?

The next step is the moveable alphabet and the pink series.  This is where it really gets exciting!  It is their opportunity to take the letters and sounds to build words  The first step in this process is to match 3 part cards with a picture and a word that matches the card with both the picture and the word, then they build the word.  

I start out with short a words the pink series is three letter short vowel words.  Continue teaching each set of short vowel words until you finally end with short u words.  Upon completion of this series your child will be able to fluently read CVC or short vowel words!  

What about sight words?
Remember that century old question I asked at the beginning?  Well here is your answer... BOTH methods are best.  In a Montessori language program we teach phonics in conjunction with whole language or sight words.  Sight words are not just words you can't sound out.  They are the most commonly used words in the English language.  I use the dolch list here.

After you teach each set of short vowel words introduce 10 sight words.  This is another area where you play games, games, games.  We have sight words be the magic word of the day.  We use funny voices such as (cowboy, valley girl, movie star and volcano) when introducing the sight words.  This makes it more interesting and fun.   A fun and educational DVD series that I use to introduce sight words is Let's meet the sight words. 

In our classroom and at home we have word wall set up.  Here is a picture of our word wall.  We use the word wall for writing workshop and sight word games.  We play sight word swat, race to the sight word, build a sight word and sight word art. 


By using sight words in conjunction with phonics it will speed up a child's fluency and they will enjoy reading much more!  Giving a child a love for reading is the gift that never stops giving. 

After the pink series is the blue series which is long vowel words and vowel combinations.  A program that uses a good systematic approach to this is primary phonics and they also include a teacher's manual that mirrors Montessori methods. 

BOB books is another great reading series for children and they also have itunes apps that are fabulous! Click here to view those. 

The last part of the reading series is the yellow or green series.  In this step the children learn blends and special sounds.  Allison's Montessori has sandpaper letters that I use to introduce this series.  Once your child has completed all of these steps he will be a fluent reader and enjoy reading!!!  My son is 5 and he reads at a 4th grade reading level because he learned with the Montessori Method starting at age 3.  

I hope this will be a useful guide on your quest to teach your child to read!  Listen to them read and read aloud to them often!

  Reading is the window to the unknown world.   

Rachel 


PreK and K Sharing Post Making a Theme Come To Life


We just finished up our pond unit and to make our theme come to life we went to the pond, the feed store and the pet store to actually experience pond habitats in real life!  The kids were thrilled and loved every minute of it!  You can read more about How we made our Theme come to life here at Pre K and K sharing
Let me know what you think!

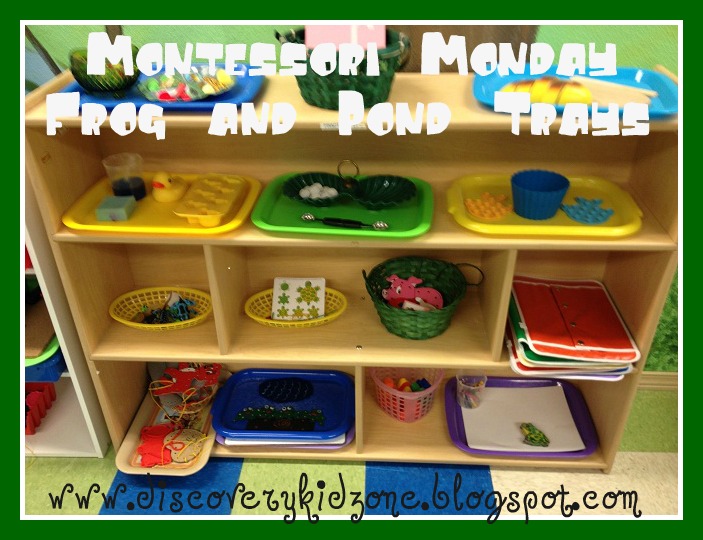
Montessori Monday Pond Trays


Montessori Monday

Frog Pond Trays

We are studying frogs and ponds this month.  For Montessori Monday I
wanted to do a post about our trays.  I get quite a few questions and
comments on where I get my items and how I set up my classroom.  I am
going to give you some tips on how to set up interesting trays in your
 classroom and at home. 
This is a duck dropper work, the child squeezes the dropper to fill up the blue water and then fills up every duck on the tray.  This builds fine motor skills and hand eye coordination.

Let me start off by saying that I was a preschool, Kindergarten teacher
 and mom all before I got my Montessori certification and became a
Montessori teacher.  The way I set up my school and homeschool reflects
 both backgrounds and I believe I have combined the best of both worlds. 

This is a pom pom transfer extension.  They have to use the tongs to transfer pom poms to the matching color frogs.  This is a build fine motor and math skills.
 First I start with a theme,  for example this month our theme is pond life. 
 Every month I go to the thrift store, target and the dollar store to
 constantly look for interesting trays and containers that can be used on
 work trays.  After each holiday and season I shop all the SALES!!  I
 have built up items over the years and now I have an abundance of things
 to choose from every month.  At the beginning of each year I make a
 scope and sequence to lay out what I want the kids to learn for homeschool
 and preschool.  I break it down into months.  Every month when I write my
lesson plans I use this as a guide and I fill out each individual child’s lesson
 plan to target those goals.  Here is where the fun part comes in!!  I
 search my items to look for works.  For example if I have kids who need
to work on operating a dropper I will look for fun ways to reinforce this
 skill with theme based items.  Every month when I put out the new works
 the kids are always waiting in anticipation to see what will be next and
 even if it is reinforcing the same skill it is packaged in a new way thus
making it more exciting! 
These are some of our language trays.  The first one is the 4 little speckled frogs.  They use the felt pieces to retell the song and story.  This reinforces language skills, counting, subtraction and sorting.
Next is draw and label a frog and sort the frog life cycle.


Here are some of our math trays, Lily pad addition using frog counters, frog sort and classify, frog counting with counters, frog patterns

Here are a few of our Practical life trays,
  frog egg transfer using small Styrofoam balls, operating a dropper duck pond, build a turtle with wiki sticks and our sewing basket.

 Some items that I always keep in stock to use are:

theme ice cube trays and silicone baking trays, Silicone shape baking cups, Colored trays, Theme erasers, Small
 plastic toys such as frogs, Water beads, Suction cup bath shapes, Marbles, Dollar store items for sensory box,
 Different colored and scented play dough , Theme based counters and letters, Theme
 based shape books made on the cricut, Crinkle paper, Medicine droppers, Various scoops and tongs from
Montessori Services, Theme based foam or felt shapes from Oriental Trading, Wiki Sticks , Pom Poms, Colored
noodles, Pipe cleaners, Letter and number beads
With these basic items you can make hundreds of fun work trays and change them often to keep it
fun and exciting!!
What new works did you make this week???

Rachel

I am linking up with living montessori now and what's on the tray wednesday

Montessori Monday <

Weekly Kid's Co-op! Frogs, Colors and Magnets


Weekly Kid's Co-Op~! Frog Colors and Magnets!
Every week we get together and combine our fun and educational kid's activities.  This week I am talking about frog life science.  Please link up your activities at the bottom!


This week for science we are learning about frogs.  We talked about Metamorphosis and explained the life cycle of the frog.  We acted out the life cycle of the frog after I showed them the frog life cycle work tray.  One of our students brought in a fabulous frog science set with real eggs, tadpoles, froglets and frogs!!  This is the most complete set I have ever seen!   


After we studying all about frog life cycles we got real tadpoles!!  We have three of them, in our science journals we drew a picture of what our tadpoles look like and wrote the date.  We will make observations daily and record our observations every Wednesday.  The older kids labeled the picture of the tadpole.  The last thing we did with the tadpoles was research how to take care of them and what to feed them. 


Our color of the month is green!  Frogs are green and St. Patrick’s Day is coming up and spring is hopefully on its way.  I introduced the color wheel and explained the primary colors (this was a review for them).  I then talked about the secondary colors.  I demonstrated how to mix blue and yellow and we discussed what color it made.  Then we experimented with different amounts of drops to see what colors it made. 


Our last science work this week was Magnets.  The kids explored with a box of objects and a “magic Magnetic wand” to see what would stick to it.  After they explored they would classify the objects.  Finally they recorded their findings by drawing pictures on a recording sheet. 


My class loved the opportunity to be scientists this week!  I am excited to watch them grow and learn more next week. 

Tell me a Story Tuesday! The Cat in the Hat!


Tell me a Story Tuesday!

The Cat in the Hat!

It is Dr. Seuss week!  Every day this week we will read a different story by Dr. Seuss and do activities to go along with that book.  Today we read The Cat in the Hat and The Cat in the Hat comes back!
For art the first thing we made was Thing one or Thing two.  This was a fun activity because we also were able to create homemade puffy paint!! 


First you add glue to a cup, next you add paint and stir it up good!  Finally you add shaving cream and stir again.  Keep adding shaving cream until the concoction is nice and fluffy!  This was super fun and super easy!


The kids traced their hands and cut them out.  They added their hands to the red bodies.  They drew the faces and wrote thing one or thing two on the belly.  Then they painted the blue puffy paint for hair.  When it dried it was still puffy! 

We had two art stations today they could make one or both.  The other station was a simple cut and paste cat in the hat.  This was a following directions craft. 

For snack we made cat in the hat treats.  We stacked red gummy lifesavers and frosting on ritz crackers to make a cute little hat.

We did a brain storm on what activities we could do on a rainy day.  Tomorrow we will use that brainstorm for writer’s workshop.  Since the book started out as a rainy day, we used that opportunity for a science experiment.  We talked about the water cycle and where rain comes from.  Our experiment was a visual of rain coming from the clouds.  I filled up clear cups about ¾ full.  On top of the water I allowed each child to squirt shaving cream.  This was our cloud.  I went around and dropped blue food coloring on top of the shaving cream and the kids were able to watch it “rain” in their cups.
Here are a few pictures of the other activities we did today! 
Cat in the hat following directions and reading game

Today I will post about Wacky Wednesday and Oobleck!  I am really enjoying reading about all of your Dr. Seuss adventures this week!

 I am linking up with www.livingmontessorinow.com for their Happy Birthday Dr. Seuss Linky party!  I am also linking up with living life intentionally


Rachel /